
If you’re looking for a deliciously sweet and buttery treat, a homemade butter braid recipe is the perfect choice. This flaky, golden-brown pastry is made from soft, yeasty dough that’s braided together and filled with a rich, buttery mixture. Whether you’re a beginner or an experienced baker, learning how to make butter braid from scratch is easier than you might think—and it’s sure to impress friends and family alike. In this guide, we’ll walk you through the step-by-step process, from making the perfect dough to braiding it beautifully. Plus, we’ll share expert tips and tricks to ensure your butter braid turns out perfect every time. So, let’s get started on creating this mouthwatering, homemade treat!
What You Will Find:
What is a Butter Braid?
Definition and Description
A butter braid is a type of sweet, braided pastry that stands out due to its rich, buttery flavor and soft, tender texture. Unlike regular bread, which can often be dense or savory, butter braid is a dessert-like bread that incorporates layers of butter, sugar, and sometimes fillings, creating a light, flaky dough with a satisfying sweetness. The dough itself is enriched, meaning it has additional fat and sugar to make it softer and more indulgent than typical bread.
What truly sets the butter braid apart from other pastries is the combination of the braiding technique and the layers of buttery goodness that melt into the dough as it bakes. The braid structure not only gives the pastry a visually appealing look but also helps distribute the butter and other fillings evenly throughout the dough, making every bite flavorful and satisfying. While similar in texture to brioche or challah bread, the butter braid’s sweetness and flaky layers make it distinctly different from other braided breads.
Key Ingredients
The key to a perfect butter braid lies in the right balance of ingredients, each contributing to its characteristic softness, flavor, and structure:
- Butter: Butter is the star ingredient in the butter braid, providing a rich, decadent flavor that gives the bread its name. The butter is incorporated into the dough and sometimes added to the filling, resulting in a light, moist, and tender texture. It also creates that golden-brown crust that’s irresistible once baked.
- Yeast: Yeast is essential for leavening the dough, allowing it to rise and become light and airy. It contributes to the overall fluffiness of the butter braid and ensures the dough has the perfect texture. Yeast also plays a role in developing the flavor of the dough, giving it a subtle tang that contrasts beautifully with the sweetness of the sugar and butter.
- Sugar: While sugar is often used for sweetness, it also plays a critical role in the dough’s texture. It helps with the browning process, contributing to the golden color of the braid as it bakes. Sugar also adds to the richness of the dough, enhancing its flavor and making the final product taste more like a decadent dessert than a standard loaf of bread.
Together, these ingredients create the perfect dough for making butter braid—a combination of sweetness, richness, and lightness that makes it an irresistible treat.
Common Variations
One of the best things about the butter braid is its versatility. While the classic butter braid is delicious on its own, many variations can be made to suit different tastes and preferences. Here are a few popular variations:
- Cinnamon Butter Braid: One of the most popular twists on the traditional butter braid is the cinnamon butter braid. A sweet cinnamon filling is spread over the dough before it’s braided, creating an aromatic and flavorful pastry. The cinnamon adds warmth and spice, making it a perfect option for fall or holiday baking.
- Fruit-filled Butter Braid: You can also add fruit fillings, such as raspberry, blueberry, or apple, to the center of the braid. These fruity variations offer a fresh contrast to the richness of the butter, creating a balanced, flavorful treat that’s great for brunches or special occasions.
- Nut-filled Butter Braid: For those who enjoy a bit of crunch, adding chopped nuts like pecans, walnuts, or almonds can bring a nice texture and flavor to the braid. The nuts pair beautifully with the buttery dough and can be mixed with other ingredients like chocolate chips or caramel for an even more indulgent treat.
- Chocolate Butter Braid: A decadent chocolate version is another variation that’s sure to be a crowd-pleaser. By adding chocolate chips or a chocolate filling to the dough, the butter braid takes on a rich, sweet flavor that chocolate lovers will adore.
These variations demonstrate just how adaptable the butter braid recipe is, allowing you to experiment with different flavors and fillings to create your own personalized pastry.
How to Make Butter Braid Dough from Scratch
Step 1: Prepare the Yeast Dough
The first step in making a perfect butter braid is preparing the yeast dough. This process involves activating the yeast and combining it with other key ingredients to create the dough’s foundation.
- Activating the Yeast: Yeast is a living organism, and it requires warm water to activate. To begin, you’ll need to warm your water to about 100–110°F (37–43°C). Too hot or too cold water can kill the yeast or prevent it from activating properly, so be sure to test the temperature before using it. Add a pinch of sugar to the warm water, then sprinkle in the yeast. Stir gently, and let it sit for 5–10 minutes until it becomes bubbly and frothy. This indicates that the yeast is active and ready to be used in your dough.
- Mixing with Ingredients: Once the yeast is activated, you can mix it with the other ingredients: flour, sugar, butter, and a pinch of salt. Start by adding flour gradually to the yeast mixture. The flour provides the structure for the dough, allowing it to rise and hold its shape. Sugar, in addition to being a sweetener, also helps feed the yeast, ensuring it continues to grow and leaven the dough. Butter adds richness, moisture, and flavor to the dough, making it soft and tender. Salt enhances the flavor and helps to control the yeast’s activity, ensuring the dough doesn’t rise too quickly.
When mixing, it’s important to do so gently and slowly, ensuring that all the ingredients are well incorporated. If you mix too quickly or too roughly, the yeast may not have enough time to activate properly. The goal is to create a sticky, cohesive dough that’s ready for the next step: kneading.
Step 2: Knead the Dough
Kneading is the process of working the dough by hand (or with a stand mixer) to develop the gluten, which gives the dough structure, elasticity, and the right texture. Proper kneading is crucial for achieving a soft, fluffy butter braid.
- How to Knead by Hand: Once you have combined all the ingredients, turn the dough out onto a lightly floured surface. Start by folding the dough over itself, pushing it away with the heels of your hands, then folding it back toward you. Rotate the dough a quarter turn, and repeat the process. Knead the dough for about 8–10 minutes. You’ll know the dough is ready when it becomes smooth, elastic, and no longer sticky. If it’s still sticky, add a little more flour, but be careful not to add too much, as this can make the dough dry.
- Kneading with a Stand Mixer: If you have a stand mixer, use the dough hook attachment to knead the dough. Start on low speed to combine the ingredients, then increase the speed slightly as the dough begins to form. Knead for about 5-7 minutes, or until the dough is smooth and elastic. The dough should easily pull away from the sides of the bowl and not stick to your hands.
- Why Kneading is Important: Kneading is essential because it activates the gluten in the flour, giving the dough structure and elasticity. This results in a soft, chewy texture that will help the braid hold together while baking. If you don’t knead enough, your butter braid could turn out dense and heavy.
Step 3: Allow the Dough to Rise
Allowing the dough to rise is a critical step in achieving the light, fluffy texture that makes butter braid so delicious. This process is called proofing, and it gives the yeast time to do its work, expanding the dough and developing flavor.
- Why Rising is Important: When the yeast ferments, it produces carbon dioxide gas, which gets trapped in the dough and causes it to rise. This gives the dough its airy, soft texture. Allowing the dough to rise also develops the flavor, as the yeast breaks down sugars and starches in the dough, creating a subtle tang.
- The Right Environment for Rising: The dough needs a warm, draft-free place to rise. Ideally, the temperature should be around 75°F (24°C). If your kitchen is cooler, you can place the dough in an oven with the light on or use a proofing box to maintain a steady temperature. Cover the dough with a clean kitchen towel or plastic wrap to prevent it from drying out during the rise.
- How Long to Let the Dough Rise: Let the dough rise for about 1 to 1.5 hours, or until it has doubled in size. You can check the dough’s progress by gently pressing a finger into it; if the indentation remains, the dough has risen enough. If the dough springs back, it needs more time to rise. If you’re short on time, a quicker rise can be achieved by placing the dough in a warm oven for 30-45 minutes.
- Punching Down the Dough: After the dough has risen, gently punch it down to release the excess gas and redistribute the yeast. This will help to create a more even texture. Then, you can proceed with shaping and braiding the dough for the butter braid.
Tips for Perfectly Braiding Your Dough
How to Braid Dough
Braiding the dough is what gives the butter braid its signature appearance, with its inviting, golden twists. It may seem tricky at first, but with a little practice, it becomes an easy and fun part of the baking process. Here’s a simple, step-by-step guide to braiding the dough for the perfect butter braid:
- Divide the Dough: Once your dough has risen and is ready to be shaped, turn it out onto a lightly floured surface. Gently punch down the dough to release any air pockets, then divide it into three equal sections (or more, depending on the style of braid you want).
- Roll Out the Dough: Roll each section into a long rope, about 12-15 inches in length. Try to keep the thickness of the ropes even, as this will help the braid look neat and uniform when baked. You can also flatten the ropes slightly with your hands to make them easier to braid.
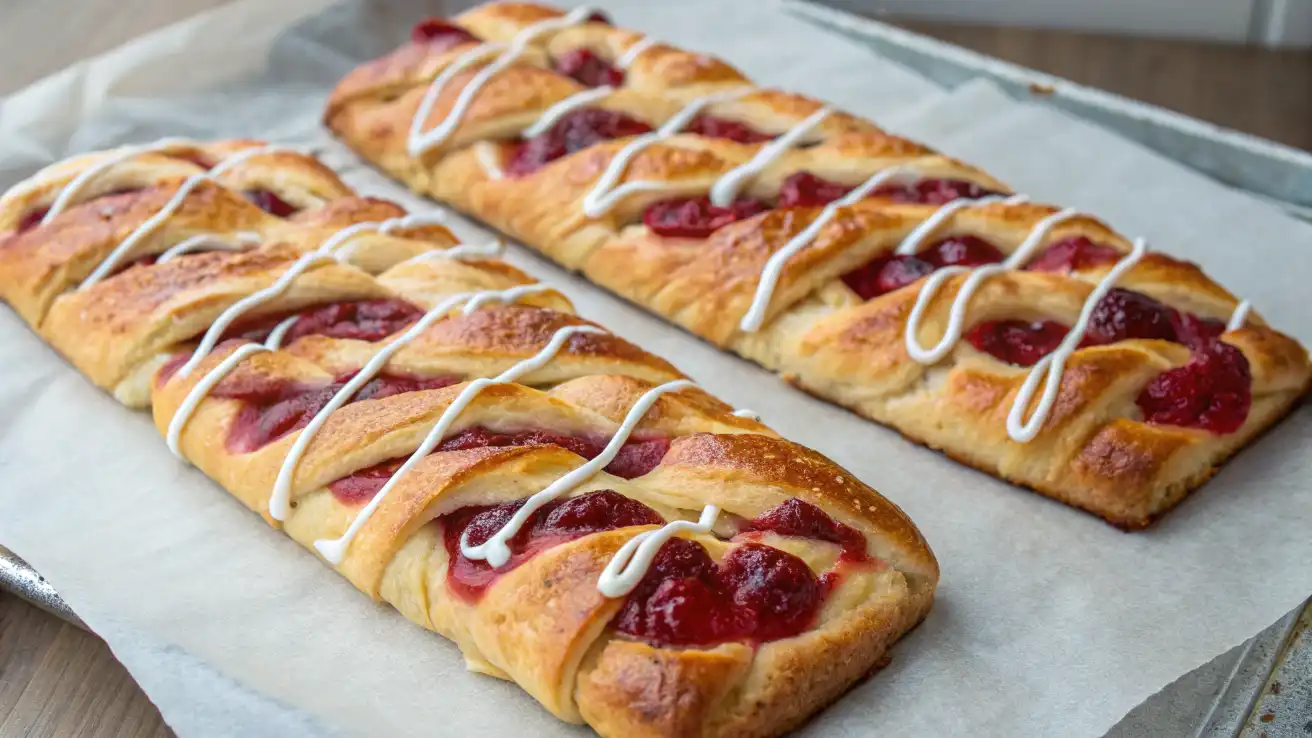
- Begin Braiding: Start by placing the three dough ropes side by side on a baking sheet lined with parchment paper. Pinch the top ends together to secure them. Begin braiding by crossing the right strand over the middle, then the left strand over the new middle strand. Continue braiding, alternating sides, until you reach the end of the dough. Make sure to keep the braid tight but not too tight, as this could cause the dough to tear.
- Secure the Ends: Once you’ve finished braiding, pinch the ends together and tuck them under the braid to create a neat, finished look. This will help the braid hold its shape as it bakes.
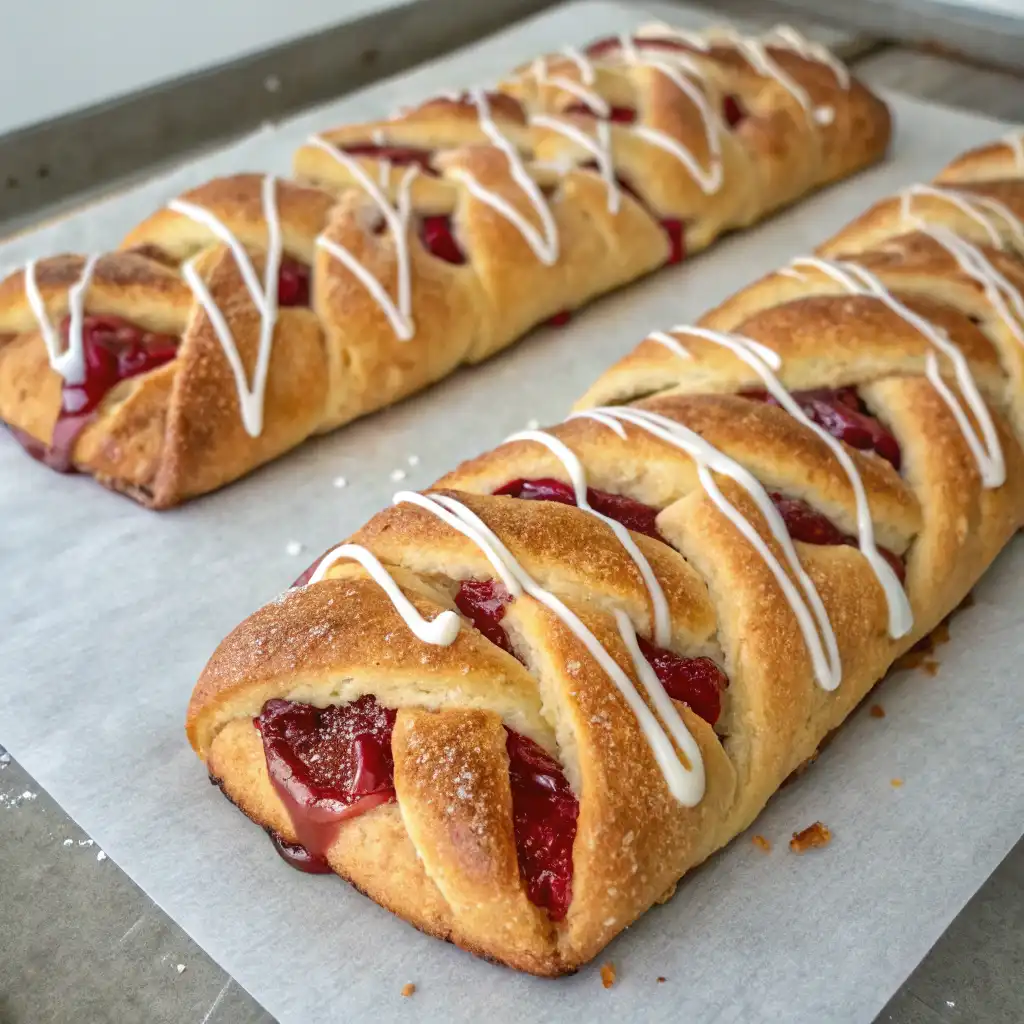
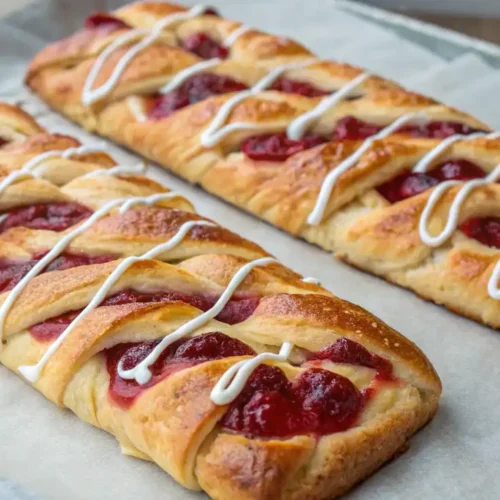
- Final Touches: For a glossy finish, you can brush the top of the braid with a little melted butter or an egg wash (whisked egg with a splash of water). This will give your butter braid a beautiful golden color once baked. Now, let the braid rest for a few minutes before placing it in the oven.
Common Mistakes to Avoid
While braiding dough may seem simple, there are a few common mistakes that can make the process trickier or impact the final result. Here are some things to avoid and how to prevent them:
- Overworking the Dough: Overworking the dough during the braiding process can lead to a tough texture. This usually happens when the dough is stretched too much or handled too aggressively. To avoid this, work gently with the dough, and if it starts to resist, allow it to rest for a few minutes before continuing. This will help the gluten relax and make the dough easier to handle without causing it to become too dense.
- Uneven Braiding: Uneven braiding can result in a butter braid that looks lopsided or doesn’t bake uniformly. To prevent this, make sure the dough ropes are of even thickness before you start braiding. Take your time when crossing over the strands and be sure to braid loosely enough to allow for some expansion as the dough rises and bakes. A tight braid can make it difficult for the dough to rise properly, leading to uneven baking.
- Not Securing the Ends Properly: If the ends of the braid aren’t sealed tightly, they may unravel during baking. Always make sure to pinch the ends together firmly, and tuck them under the braid to secure the shape. This will help the dough stay together and maintain a neat appearance.
- Skipping the Resting Time: After braiding, some bakers are tempted to skip the final resting time before baking. However, allowing the dough to rest for 10-15 minutes before placing it in the oven allows it to rise slightly, resulting in a fluffier texture. Skipping this step can cause the braid to be denser than expected.
Braiding Variations
While the classic three-strand braid is the most common technique for a butter braid, there are a few different braiding styles you can try for a more intricate or unique look. Here are some braiding variations to consider:
- Classic Three-Strand Braid: The simplest and most traditional method, this is what most people associate with butter braids. As mentioned earlier, it involves braiding three strands of dough into a tight, even twist. This creates a simple, uniform look and is perfect for beginners.
- Four-Strand Braid: For a slightly more complex look, try braiding four strands instead of three. This creates a thicker braid with more texture. To braid four strands, lay them side by side and start by crossing the far left strand over the second strand, then alternate between the right strands, always keeping the pattern consistent. A four-strand braid will give the butter braid a fuller, more sophisticated appearance.
- Fishtail Braid: For a fancier and more intricate look, try the fishtail braid. This technique uses only two strands of dough, and instead of braiding in a traditional manner, you alternate pulling small sections from the outside of each strand over the top and into the center. This creates a delicate, crisscross pattern that looks beautiful and elegant. It may take a little longer to master, but the result is a stunning, visually striking braid.
- Twisted Braided Butter Braid: Instead of a traditional braid, you can also twist the dough into a spiral shape. Roll the dough into a long rope, then twist the rope tightly and shape it into a spiral on the baking sheet. This gives a beautiful, whimsical effect while still showcasing the buttery dough. It’s perfect for those looking for a more rustic or decorative finish.
- Double Braid: Another creative option is the double braid, where you braid two separate sections of dough and then twist them together to form one large braid. This creates a thick, voluminous braid with lots of layers, perfect for those who want a dramatic presentation.
By experimenting with different braiding techniques, you can give your butter braid a unique look that suits any occasion, from a simple breakfast treat to an impressive dessert for special gatherings.
Baking the Perfect Butter Braid
Preheating the Oven
Preheating your oven is essential to ensure consistent baking. Here’s why it’s so important:
- Even Cooking: A preheated oven provides stable heat, allowing the dough to bake uniformly. This prevents uneven rise and texture.
- Optimal Rise: Proper heat helps the yeast continue to rise in the first few minutes of baking, ensuring a light and airy texture.
- Golden Finish: Preheating helps caramelize the sugar in the dough, creating that perfect golden-brown color and a deliciously crisp crust.
Steps for Preheating:
- Turn on the oven and set it to 350°F (175°C).
- Allow 10-15 minutes for the oven to reach the proper temperature.
- Wait until the oven reaches the desired temperature before placing the dough inside.
Egg Wash for a Golden Finish
An egg wash creates a glossy, golden-brown finish on your butter braid. Here’s how to do it perfectly:
- What is an Egg Wash?: A mixture of egg and liquid (water or milk) brushed over the dough before baking. It gives the braid a shiny finish and a rich, golden color.
How to Apply an Egg Wash:
- Crack an egg into a small bowl and beat it with a fork until the yolk and white are fully blended.
- Add 1 tablespoon of water or milk to thin the mixture slightly.
- Using a pastry brush, gently apply a thin, even layer of egg wash to the dough.
- Avoid over-applying—just a light coat is sufficient.
Optional Finishing Touch:
- Sprinkle sugar or cinnamon on top for extra flavor and a more attractive crust.
Baking Time and Temperature
To get a perfectly baked butter braid, you need the right temperature and baking time:
Ideal Baking Temperature:
- Set your oven to 350°F (175°C) for an even bake that won’t over-brown the outside while ensuring the inside cooks through.
Baking Time:
- Small braids: Bake for 25-30 minutes.
- Larger or thicker braids: Bake for 30-35 minutes.
How to Know It’s Done:
- Color: The braid should be golden-brown all over.
- Sound: Tap the braid gently—if it sounds hollow, it’s done.
- Internal Temperature: Check the internal temperature with a thermometer—it should be around 190°F (88°C).
- Avoid Overbaking: Overbaking will result in a dry, hard crust. Keep an eye on the braid to achieve a golden exterior and a soft, buttery interior.
Cooling:
After removing the braid from the oven, let it cool on a wire rack for at least 10 minutes to set the texture and prevent the filling from becoming runny. This also enhances the flavor.
Troubleshooting and Tips for Success
What to Do if the Dough Isn’t Rising
If your dough isn’t rising as expected, here are some tips to help:
- Check the Yeast: Ensure your yeast is still active by dissolving it in warm water (100°F-110°F / 37°C-43°C) with a pinch of sugar. If it doesn’t foam after 5-10 minutes, it may be expired, and you’ll need to use fresh yeast.
- Proper Temperature: Yeast thrives in warmth. If your kitchen is cool, place the dough in a warm spot, such as an oven with the light on or near a heater. Ideal temperature for dough to rise is around 75°F-85°F (24°C-29°C).
- Flour and Liquid Balance: If your dough feels too stiff, you may need more liquid, or if it’s too sticky, add a bit more flour. The dough should be soft and slightly tacky.
- Give It Time: Yeast can be slow in cooler temperatures. If it’s taking longer to rise, give it extra time and be patient.
- Re-kneading: If the dough isn’t rising properly, knead it again gently for a few minutes and then let it rest for 10-15 minutes before allowing it to rise again.
How to Store Your Butter Braid
Proper storage keeps your butter braid fresh for longer:
- Room Temperature: For short-term storage, keep your butter braid in an airtight container or wrapped tightly in plastic wrap. It will stay fresh for 2-3 days at room temperature.
- Freezing: Wrap the braid tightly in plastic wrap or foil and store it in a freezer-safe bag or container. It can be frozen for up to 3 months. To serve, thaw at room temperature or reheat in the oven at 300°F (150°C) for 10-15 minutes.
- Refrigeration: You can refrigerate your butter braid for up to 5 days, though it may lose some flakiness. Reheat in the oven before serving for the best texture.
Additional Flavoring Options
Customizing your butter braid is easy with these flavor ideas:
- Cinnamon Sugar: For a classic, sweet version, spread butter over the dough and sprinkle with a mixture of cinnamon and sugar before braiding.
- Vanilla: Add vanilla extract to your dough for a warm, aromatic flavor. You can also drizzle a vanilla glaze over the baked braid for extra sweetness.
- Fruit Fillings: Add fruit fillings such as apple cinnamon, berry compote, or peach jam for a fruity twist. These work great as fillings inside the braid.
- Chocolate: Spread chocolate (like Nutella or chocolate ganache) inside the dough before braiding for a decadent treat.
- Nuts: Add texture and flavor with crushed nuts, like pecans, walnuts, or almonds. Toast them lightly before adding them to the filling for enhanced flavor.
With these flavoring options, you can easily create a butter braid that suits your tastes or experiment with new variations.
Final Thoughts
Making a homemade butter braid is a fun and rewarding experience, offering a perfect blend of buttery, flaky goodness and endless customization options. Whether you’re following a classic recipe or adding your favorite flavors, this pastry is sure to impress. By understanding the key steps, troubleshooting tips, and storage methods, you can create a delicious butter braid every time. So, gather your ingredients, get creative with fillings, and enjoy the process of baking this beautiful and tasty treat. For more delicious pastries, check out our recipe for Baked Apple Fritters. Happy baking!
FAQs About Butter Braid Recipe
Can I make butter braid dough ahead of time?
Yes, you can prepare the dough ahead of time. After kneading, cover it tightly and refrigerate it for up to 24 hours. Allow it to come to room temperature before proceeding with the recipe.
How do I know if my butter braid is fully baked?
The butter braid should be golden brown on the outside, and when tapped on the bottom, it should sound hollow. You can also use a kitchen thermometer to check that the internal temperature has reached around 190°F (88°C).
Can I freeze a butter braid after baking?
Yes, you can freeze the butter braid after baking. Wrap it tightly in plastic wrap or foil and store it in a freezer-safe bag. Thaw it at room temperature or reheat in the oven before serving.
What if my dough is too sticky?
If your dough is too sticky, add small amounts of flour (a tablespoon at a time) until it reaches the right consistency. The dough should be soft and slightly tacky but not overly sticky.
Can I add different fillings to the butter braid?
Absolutely! You can customize your butter braid with various fillings like cinnamon sugar, fruit jams, chocolate, or nuts. Get creative and experiment with flavors to make it your own.
How long should I let the dough rise?
The dough should rise for about 1 to 1.5 hours or until it has doubled in size. However, if the room is cooler, it may take longer. Be patient and allow the dough to rise fully for the best texture.
Butter Braid Recipe
Ingredients
- 1/2 cup warm milk 110°F
- 1/4 cup sugar
- 2 1/4 teaspoons active dry yeast
- 1/2 cup unsalted butter softened
- 1/2 teaspoon salt
- 2 large eggs
- 4 cups all-purpose flour plus extra for dusting
- 1 teaspoon vanilla extract
- 1 tablespoon butter for brushing
- 1 egg for egg wash
Optional Filling:
- 1/2 cup brown sugar
- 1 tablespoon cinnamon
- 1/2 cup chopped nuts such as pecans or walnuts
Optional Glaze:
- 1/2 cup powdered sugar
- 1 tablespoon milk
Instructions
Activate the Yeast:
- In a small bowl, combine warm milk, sugar, and yeast. Stir gently and let it sit for about 5-10 minutes until it becomes frothy.
Prepare the Dough:
- In a large bowl, mix together flour and salt. Create a well in the center and add the yeast mixture, softened butter, and eggs.
- Stir until a dough forms, then knead the dough on a lightly floured surface for 8-10 minutes, or until it’s smooth and elastic.
First Rise:
- Place the dough in a greased bowl, cover with a clean towel, and let it rise in a warm spot for 1-1.5 hours, or until it doubles in size.
Prepare the Filling (Optional):
- Mix together brown sugar, cinnamon, and chopped nuts in a small bowl. Set aside for later use.
Shape the Dough:
- Punch down the dough and roll it into a rectangle (about 12 x 18 inches). Spread the filling evenly over the dough, leaving about an inch on all sides.
- Starting from one edge, roll the dough tightly into a log. Pinch the edges to seal.
Braid the Dough:
- Cut the dough log down the middle lengthwise. Twist the two halves together, forming a braid. Pinch the ends together and tuck them under.
Second Rise:
- Place the braided dough on a greased baking sheet. Cover it with a towel and let it rise for 30-45 minutes, or until puffy.
Preheat the Oven:
- Preheat the oven to 350°F (175°C).
Egg Wash:
- Beat one egg and brush it evenly over the surface of the dough for a shiny, golden finish.
Bake:
- Bake in the preheated oven for 25-35 minutes, or until the butter braid is golden brown and sounds hollow when tapped on top.
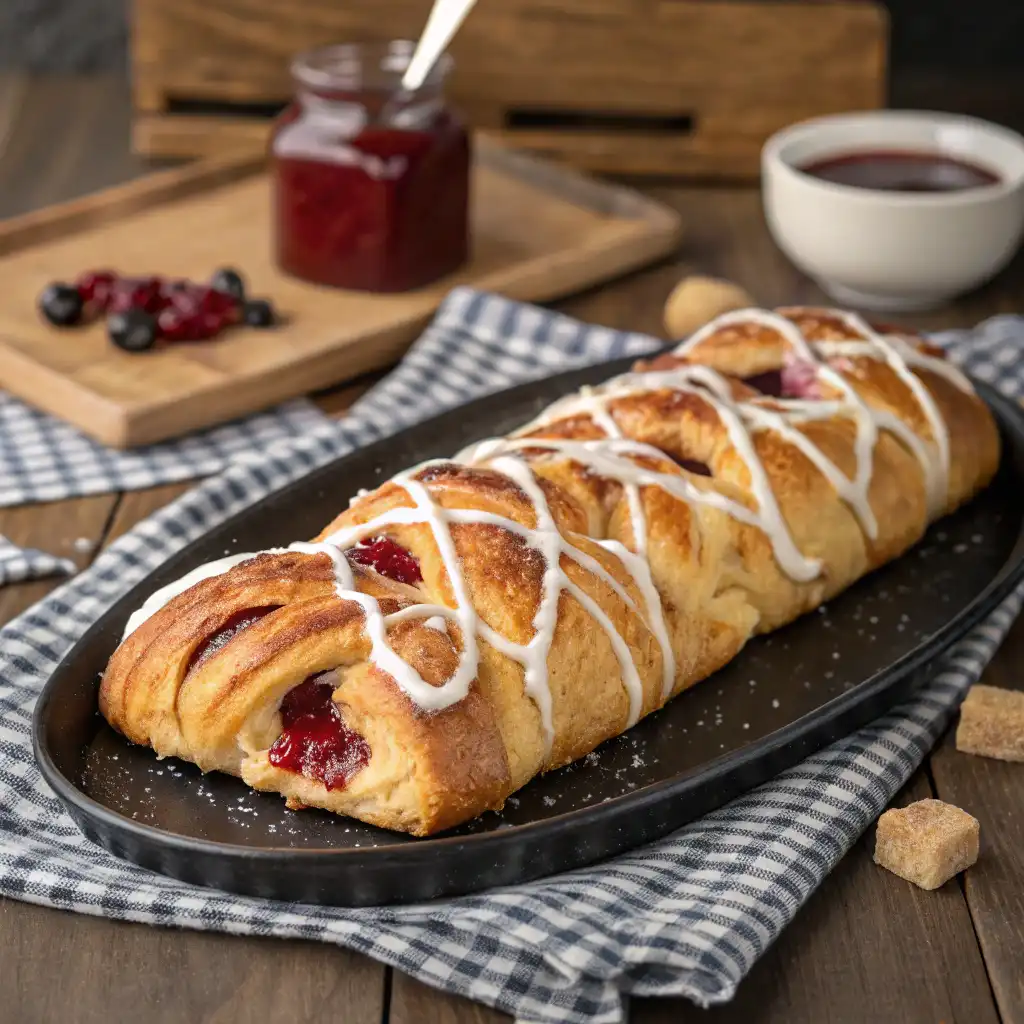
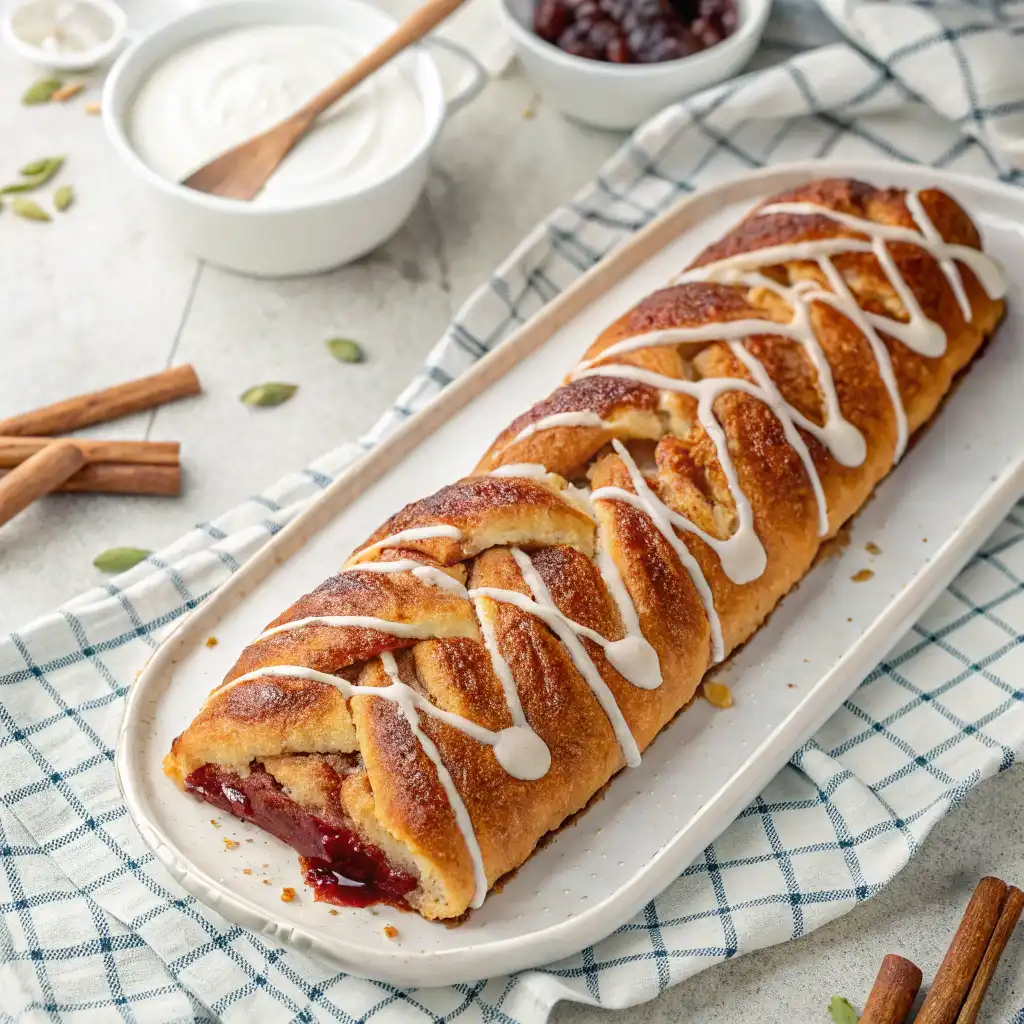
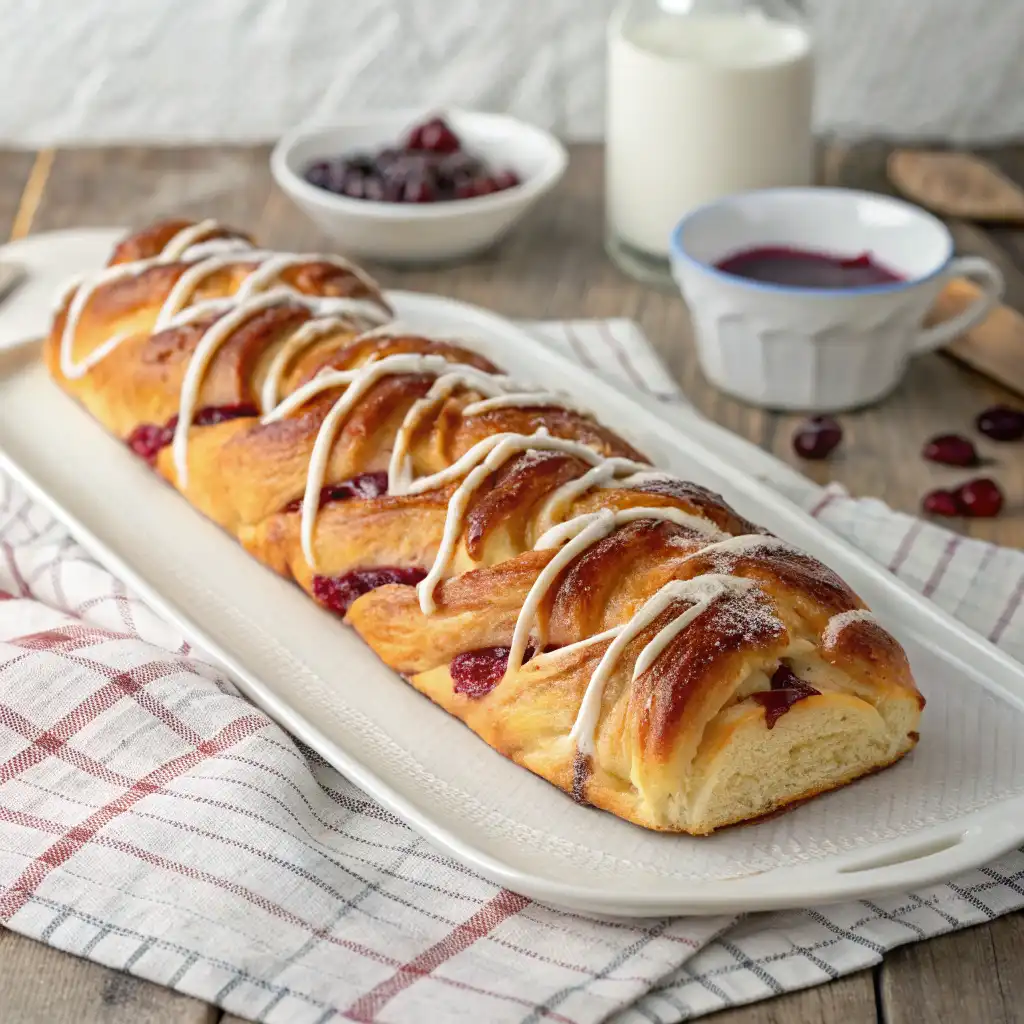
Cool and Glaze (Optional):
- Let the braid cool on a wire rack for 10 minutes. For an extra touch, mix powdered sugar and milk to create a glaze, and drizzle it over the cooled braid.
Serve and Enjoy:
- Slice and enjoy your homemade butter braid!
Notes
- Calories: 290 kcal
- Fat: 12g
- Saturated Fat: 6g
- Carbohydrates: 39g
- Fiber: 2g
- Sugar: 15g
- Protein: 4g
- Cholesterol: 45mg
- Sodium: 190mg
- Potassium: 120mg