

Baked chicken thighs are the perfect dish for anyone looking to enjoy juicy, flavorful, and crispy chicken with minimal effort. Whether you’re a beginner in the kitchen or a seasoned cook, mastering the art of baking chicken thighs is an essential skill. Unlike leaner cuts like chicken breasts, thighs are packed with flavor and stay tender even when cooked to perfection. In this guide, we’ll walk you through everything you need to know—from choosing the right seasoning to getting that golden-brown, crispy skin every time. Follow these simple steps, and you’ll be baking the perfect chicken thighs that are sure to impress your family and friends!
What You Will Find:
Why Choose Chicken Thighs for Baking?
Flavor and Juiciness
Chicken thighs are often regarded as the most flavorful and juicy part of the chicken. Here’s why:
- Higher Fat Content: Chicken thighs contain more fat than chicken breasts, which helps keep the meat juicy and tender during cooking.
- Rich Flavor: The dark meat of chicken thighs has a deeper, more savory taste, making them ideal for rich marinades and seasonings.
- Better for Absorbing Flavors: Due to their higher fat content, chicken thighs are excellent at absorbing spices, herbs, and marinades, resulting in enhanced flavors.
With their natural richness and tenderness, chicken thighs are the perfect choice for a flavorful meal.
Cost-Effective
If you’re looking for a way to save money without sacrificing taste, chicken thighs are a great choice:
- Cheaper Than Chicken Breasts: Chicken thighs are typically much more affordable than chicken breasts, making them a budget-friendly option.
- Great for Meal Prep: Their low cost allows you to buy in bulk and prepare meals ahead of time, perfect for feeding large families or meal prepping for the week.
- Versatile: Whether you’re grilling, baking, or stir-frying, chicken thighs work in a variety of recipes, giving you plenty of options for your meals at a low cost.
Chicken thighs offer great value for money without compromising on flavor, making them a top pick for budget-conscious cooks.
Perfect for Beginners
For those just starting out in the kitchen, chicken thighs are an excellent choice:
- Less Likely to Dry Out: The higher fat content in chicken thighs helps prevent the meat from drying out, even if they’re slightly overcooked.
- Easy to Cook: Chicken thighs are very forgiving and don’t require the precision that lean cuts like chicken breasts demand. They’re perfect for beginners who are learning how to cook.
- Versatile Cooking Methods: Whether baking, roasting, or pan-searing, chicken thighs are easy to cook using various methods, making them perfect for novice chefs.
With their forgiving nature and versatility, chicken thighs allow beginners to experiment and build confidence in the kitchen.
How to Season Chicken Thighs for the Perfect Flavor
Best Seasoning for Chicken Thighs
Seasoning is key to making baked chicken thighs truly shine. Here are some of the best seasonings to use for maximum flavor:
- Garlic: Garlic, whether fresh, minced, or in powder form, brings a savory depth to the chicken thighs. It pairs perfectly with almost any seasoning, from herbs to spices, and enhances the overall flavor.
- Paprika: This versatile spice adds a mild, smoky flavor to your chicken thighs. It can also contribute a vibrant color, making your dish more visually appealing. Smoked paprika, in particular, gives a rich, deep flavor.
- Salt and Pepper: The classic combo, salt and pepper, are essential for any seasoning mix. Salt helps bring out the natural flavors of the chicken, while pepper adds a subtle heat. Use freshly ground black pepper for the best flavor.
- Onion Powder: Another essential seasoning that complements garlic well, onion powder adds a savory, slightly sweet flavor that enhances the overall taste of your chicken thighs.
- Chili Powder or Cayenne Pepper: If you enjoy a bit of heat, chili powder or cayenne pepper can add a spicy kick to your chicken thighs, balancing the savory flavors of garlic and paprika.
These seasonings combine to create a balanced, flavorful coating that makes your baked chicken thighs irresistible.
Marinades for Extra Flavor
Marinades are an excellent way to infuse chicken thighs with deep, complex flavors before cooking. Here are some simple yet flavorful marinade ideas:
- Lemon and Olive Oil: A classic marinade that adds a refreshing citrusy kick. The acidity of lemon helps tenderize the chicken, while the olive oil keeps the meat moist and juicy. To enhance the flavor, add garlic, salt, pepper, and a pinch of dried thyme or rosemary.
- Garlic and Herb Marinade: Combine olive oil, minced garlic, fresh thyme, rosemary, and a touch of lemon juice. This marinade infuses the chicken thighs with a fragrant, herbaceous flavor. It’s a great choice for anyone who loves fresh, aromatic herbs.
- Balsamic Vinegar Marinade: For a slightly sweet, tangy flavor, balsamic vinegar works wonderfully. Combine it with olive oil, honey, garlic, salt, and pepper to create a marinade that adds both depth and sweetness to the chicken.
- Yogurt and Spice Marinade: If you’re looking for something richer, a yogurt-based marinade works wonders. Combine plain yogurt, garlic, lemon juice, cumin, paprika, and salt for a creamy marinade that tenderizes the meat while adding flavor.
Let your chicken thighs marinate for at least 30 minutes (or up to overnight) to ensure the flavors fully penetrate the meat, resulting in a flavorful and juicy roast.
Dry Rub vs. Marinade
Both dry rubs and marinades are excellent ways to season chicken thighs, but they have different effects on the meat. Here’s how they differ:
- Dry Rub: A dry rub consists of a mixture of spices, herbs, salt, and sometimes sugar, which is rubbed directly onto the chicken’s surface. Dry rubs create a flavorful crust or bark on the chicken as it bakes, which adds texture and intense flavor. They are ideal for crispy, flavorful skin and can be used quickly (with just a short time to sit on the chicken) or left for a few hours to develop more flavor. Use a dry rub if you want a more intense, spice-forward flavor without marinating the chicken.
- Marinade: A marinade is a liquid-based mixture typically made with oils, acids (like lemon juice or vinegar), and seasonings. Marinades penetrate deeper into the meat, tenderizing and infusing the chicken with flavors throughout. If you want to enhance the juiciness and tenderness of the chicken thighs while adding flavor, a marinade is the best option. Marinades are ideal for longer preparation times, and the chicken should be marinated for at least 30 minutes, though overnight is often best.
When to Use Each:
- Use a dry rub when you’re looking for a quick flavor boost or if you want to achieve a crispy, flavorful crust on the chicken.
- Use a marinade when you want to tenderize the meat and infuse deeper, more complex flavors. Marinades are great when you have the time to let the chicken sit for an extended period.
Both methods can deliver excellent results, so choosing between them depends on the time available and the flavor profile you’re aiming for.
Step-by-Step Guide to Baking Chicken Thighs
Preheat Your Oven
Preheating your oven is a critical step in ensuring that your baked chicken thighs cook evenly and come out with the perfect texture. Here’s why getting the oven temperature just right is so important:
- Consistent Cooking: Preheating ensures that your chicken thighs start cooking immediately once placed in the oven. If the oven is too cold, the chicken will cook unevenly, potentially leading to dry or undercooked spots. On the other hand, if the oven is too hot, the outside may burn while the inside remains undercooked.
- Crispy Skin: A properly preheated oven helps to create a crispy skin. For chicken thighs, temperatures between 375°F and 400°F are ideal, depending on the desired result. Higher temperatures, like 400°F, will give you a crispy, golden-brown skin, while 375°F offers a good balance of juiciness and crispiness without over-browning.
- Faster Cooking: Preheating speeds up the cooking process, so you don’t have to wait as long for your chicken thighs to reach the right level of doneness. This is especially helpful when you’re preparing a quick, weeknight meal.
Preheat your oven to the right temperature before placing the chicken in to ensure even cooking and optimal flavor and texture.
Preparing the Chicken Thighs
One of the keys to achieving crispy, golden skin on your baked chicken thighs is removing excess moisture. Here’s why it’s essential and how to do it properly:
- Why Patting the Chicken Dry Matters: Chicken thighs, especially when skin-on, often contain excess moisture from washing or storage. If you skip this step, the moisture on the skin can prevent it from crisping up during baking. Moisture creates steam, which will make the skin soggy rather than crispy. Patting the chicken thighs dry with paper towels helps to eliminate this moisture, allowing the skin to become beautifully crisp during baking.
- How to Pat Chicken Dry: Use a clean paper towel to gently blot the chicken thighs, especially the skin, on both sides. Press lightly to absorb excess moisture, but avoid rubbing or tearing the skin. If you’re preparing multiple thighs, you may want to dry each one separately to ensure even moisture removal.
- Optional: Season After Drying: Once the chicken is patted dry, you can apply your seasoning, whether it’s a dry rub or a marinade. Dry seasoning sticks better to the chicken’s surface when there’s less moisture, allowing for a more flavorful crust.
By drying your chicken thighs before cooking, you’ll maximize the chances of getting perfectly crispy skin, enhancing both the texture and taste of your meal.
Baking Time and Temperature
Understanding the optimal cooking time and temperature for chicken thighs is key to ensuring they come out perfectly cooked every time. Here’s a breakdown of what to keep in mind:
- Cooking Temperature: As mentioned, baking chicken thighs at temperatures between 375°F and 400°F is ideal for achieving both crispy skin and juicy, tender meat. A temperature of 375°F gives a more even cooking result, while 400°F is better for a crispier exterior.
- Bone-In vs. Boneless Thighs:
- Bone-In Thighs: These take longer to cook because the bone acts as an insulator, slowing the cooking process. Typically, bone-in thighs take between 35 to 40 minutes to cook through at 375°F to 400°F. You’ll know they’re done when the internal temperature reaches 165°F, and the juices run clear.
- Boneless Thighs: Boneless chicken thighs cook faster since there’s no bone to slow down the heat penetration. They usually take around 25 to 30 minutes at the same temperature range. Check for doneness by ensuring the internal temperature reaches 165°F, and the meat should feel firm to the touch.
- Thickness of the Thighs: The thickness of your chicken thighs plays a role in the cooking time. Thicker thighs will need more time to cook through, while thinner thighs will cook more quickly. If you’re using particularly thick thighs, consider adding a few extra minutes to your cooking time to ensure they are cooked all the way through.
- Checking for Doneness: The best way to check if your chicken thighs are fully cooked is by using a meat thermometer. Insert it into the thickest part of the thigh (without touching the bone) to check that it has reached at least 165°F. Additionally, you can also test by cutting into the meat—if the juices run clear and the meat is no longer pink, it’s safe to serve.
By understanding the ideal baking time and temperature for both bone-in and boneless chicken thighs, you can ensure that your chicken is cooked perfectly every time, with juicy meat and crispy skin.
Tips for Achieving Crispy Skin on Baked Chicken Thighs
Use High Heat
Baking chicken thighs at 400°F is the sweet spot for achieving that golden, crispy skin. Here’s why high heat plays a crucial role in creating crispy, flavorful skin:
- The Maillard Reaction: When you bake chicken at a high temperature like 400°F, the Maillard reaction occurs. This is a chemical reaction between amino acids and reducing sugars that happens at high heat, creating that delicious brown, crispy crust on the skin. This reaction not only improves flavor but also enhances the texture, giving your chicken thighs that perfect crispiness on the outside while maintaining juicy tenderness on the inside.
- Evaporating Moisture: The higher temperature helps to quickly evaporate excess moisture from the skin, which is critical for creating a crispy texture. When moisture evaporates rapidly, the skin becomes dry and crisp, rather than steaming and becoming soggy. This is especially important for skin-on thighs, where moisture trapped in the skin can lead to less-than-ideal results.
- Reduced Cooking Time: Baking at 400°F speeds up the cooking process, helping you get a crispy crust without overcooking the meat. The quick cooking time ensures the chicken stays juicy inside, while the exterior crisps up beautifully.
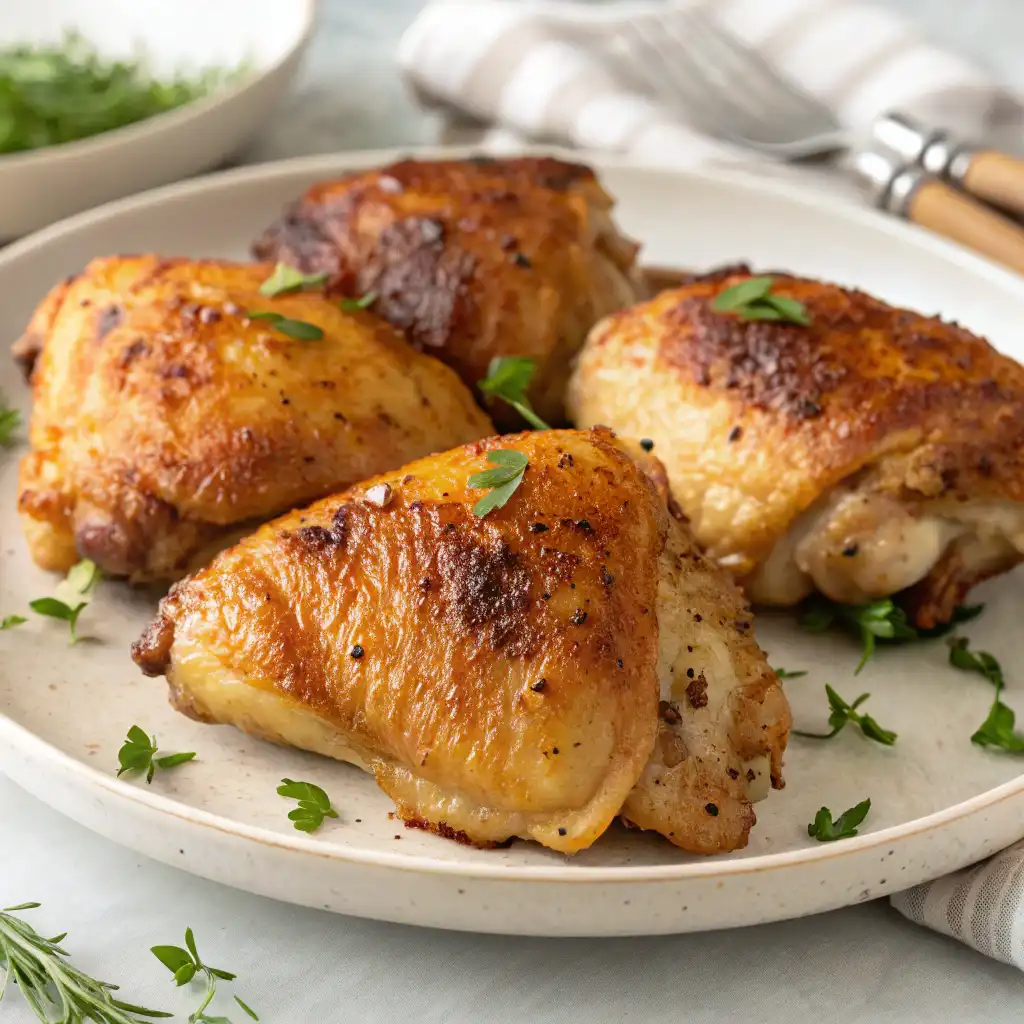
Baking at 400°F ensures the skin crisps up quickly, while still maintaining the juicy and tender interior of the chicken thighs, making it an essential step for achieving perfect results.
Use a Baking Sheet
The right equipment plays a crucial role in achieving perfectly baked chicken thighs. A baking sheet (or sheet pan) is essential for a few key reasons:
- Even Cooking: A baking sheet provides a flat, even surface that allows the hot air in the oven to circulate around the chicken thighs evenly. This ensures uniform cooking on all sides, which is essential for both crispy skin and tender meat. If the chicken thighs are crowded or placed on a small pan, they can cook unevenly, with some areas undercooked while others are overdone.
- Preventing Sogginess: Placing chicken thighs directly on a baking sheet prevents them from sitting in their own juices, which can cause sogginess. If you were to use a pan with raised edges or a smaller dish that collects juices, the chicken might steam instead of bake, leading to a soft, unappealing texture. Using a baking sheet allows excess fat and moisture to drain away, helping the skin stay crisp rather than becoming wet.
- Extra Crispy Texture: A baking sheet allows air to flow freely around the chicken, which is crucial for achieving that crispy skin all over. If you have a wire rack, placing it on top of the baking sheet can further elevate the chicken off the surface, allowing fat to drain and air to circulate, which makes the skin even crispier.
For the best results, ensure the chicken thighs are spread out evenly on a baking sheet, with enough space between each piece to allow for proper airflow. This ensures that every piece cooks evenly and crisply.
Add a Little Olive Oil
Olive oil is a secret ingredient for achieving the perfect crispy skin on baked chicken thighs. Here’s why it works so well:
- Promotes Crispy Skin: Olive oil helps to coat the skin, creating a barrier that locks in moisture while promoting the crisping process. When the chicken is coated with olive oil, it forms a thin, even layer that crisps up when exposed to high heat. The oil’s fat content also helps to render the chicken’s skin, further enhancing the texture and achieving that satisfying crunch.
- Enhances Flavor: In addition to its role in crisping, olive oil adds a rich, savory flavor to the chicken. Extra virgin olive oil, in particular, has a distinct taste that complements the natural flavors of the chicken. The oil can also help infuse any seasonings or herbs you apply to the chicken, giving you a more flavorful result.
- Helps Even Browning: Olive oil ensures an even, golden-brown color across the chicken’s surface. Without oil, the skin can become unevenly browned, or the chicken might dry out in some areas. A light coating of olive oil helps the skin to cook evenly, providing that perfectly crisp, golden-brown finish.
- Moisture Retention: Olive oil also helps to retain the chicken’s moisture, which is important for keeping the meat juicy. While the skin crisps up, the oil helps lock in the natural juices, preventing the chicken from drying out.
To achieve a perfectly crispy texture, lightly coat the chicken thighs with olive oil, ensuring that every part of the skin gets an even layer. You can also drizzle a little extra on top before baking for an added touch of flavor and texture.
How to Tell When Baked Chicken Thighs Are Done
Internal Temperature
Achieving the right internal temperature is one of the most important factors when it comes to cooking chicken thighs properly. Not only does it ensure safety, but it also guarantees juicy, tender meat. Here’s why temperature is key:
- Safety First: The United States Department of Agriculture (USDA) recommends cooking poultry, including chicken thighs, to a minimum internal temperature of 165°F (74°C). This is the safe cooking temperature at which harmful bacteria like Salmonella and Campylobacter are killed, ensuring your meal is safe to eat.
- Juiciness and Tenderness: While 165°F is the safety benchmark, chicken thighs are naturally more forgiving than chicken breasts because of their higher fat content. They stay juicy even when cooked properly at this temperature, resulting in moist, flavorful meat. If you cook chicken thighs to this temperature, you’ll avoid the common problem of dry or overcooked meat.
- Using a Meat Thermometer: The best way to check your chicken’s internal temperature is by using an instant-read meat thermometer. Insert the thermometer into the thickest part of the chicken thigh, making sure not to touch the bone. When the thermometer reads 165°F, your chicken thighs are perfectly cooked.
- Thick vs. Thin Cuts: Thicker chicken thighs may take slightly longer to reach 165°F, so you might need to give them a few extra minutes in the oven. However, don’t worry if your thighs seem a bit thicker or thinner than average – the goal is always to hit that 165°F target for safe, juicy results.
By ensuring the internal temperature reaches 165°F, you guarantee that your chicken thighs are both safe to eat and wonderfully tender, juicy, and flavorful.
Visual Indicators
While using a meat thermometer is the most accurate way to check for doneness, there are also visual indicators that can help you determine when your chicken thighs are perfectly cooked:
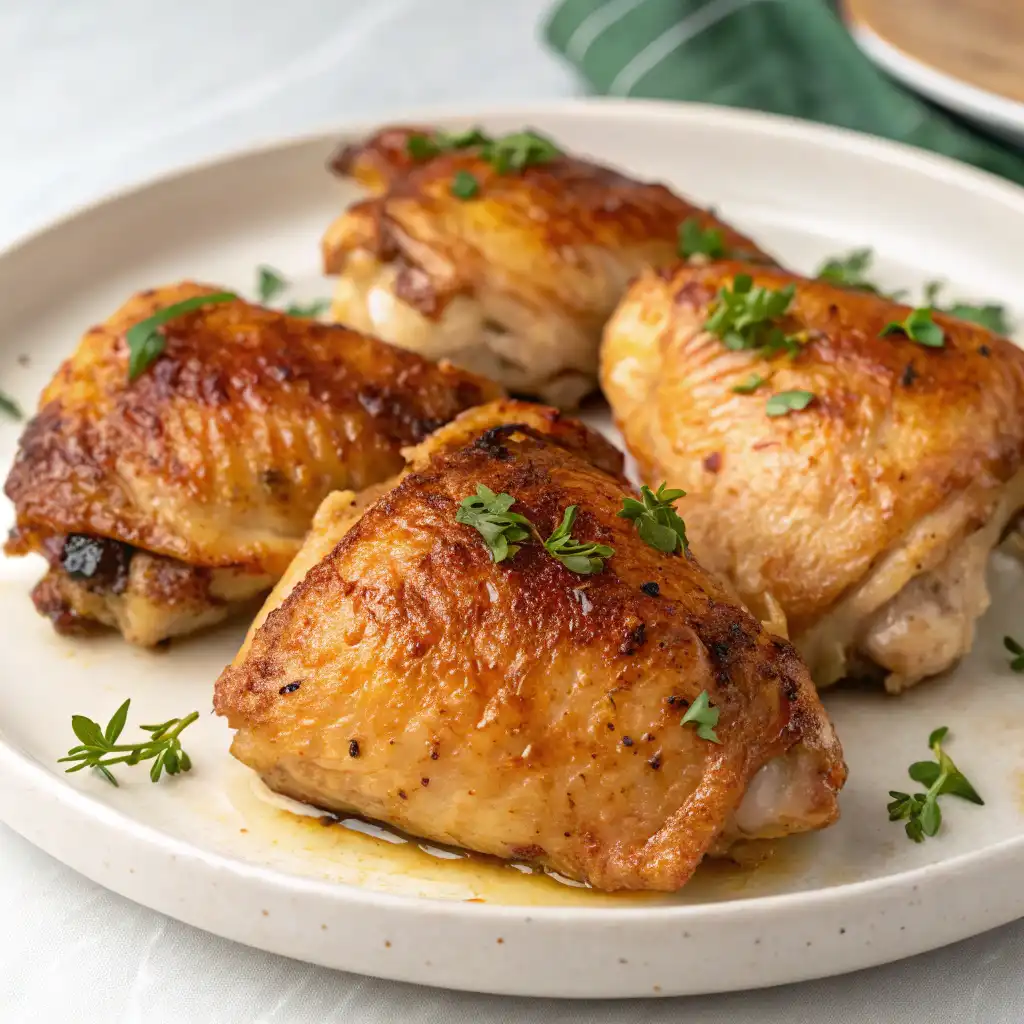
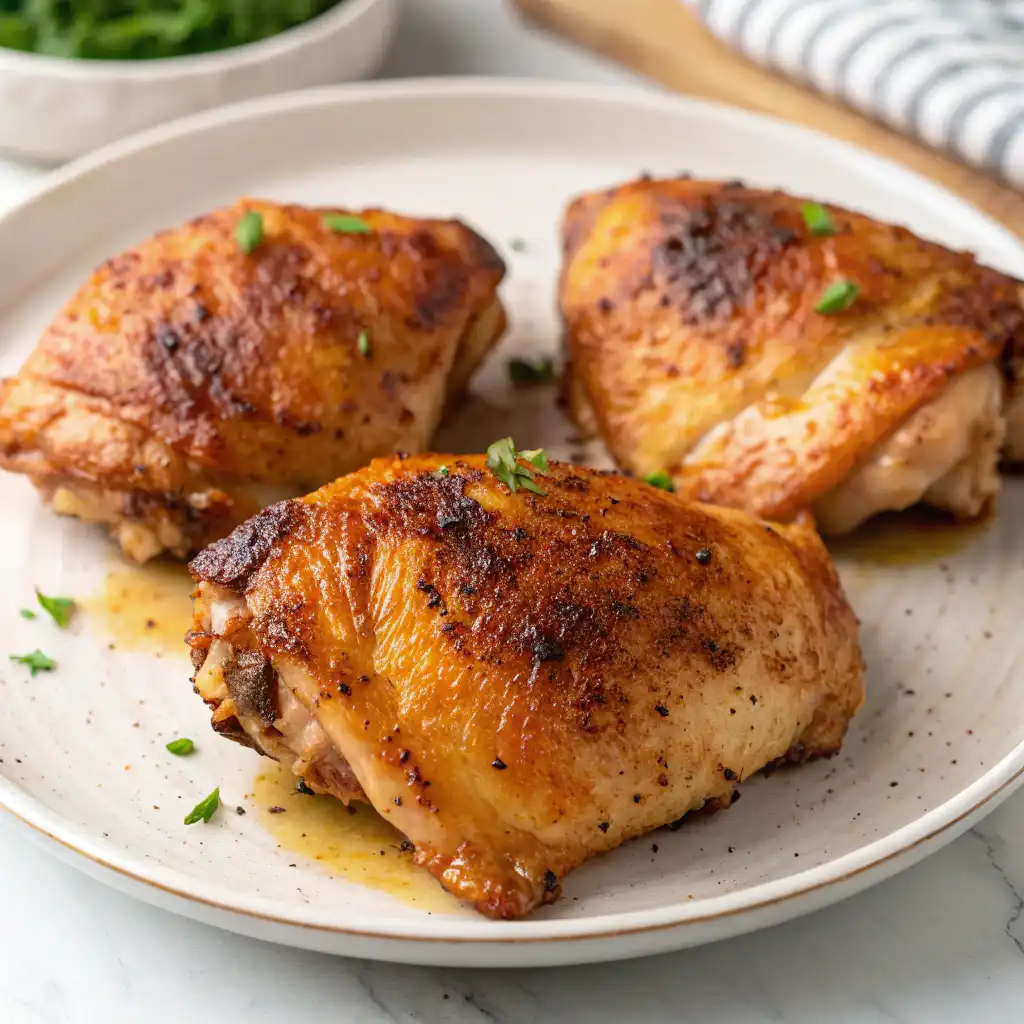
- Golden-Brown, Crispy Skin: One of the most noticeable visual cues that your chicken thighs are cooked perfectly is the skin. When baked at high heat (400°F), the skin should turn a deep golden-brown color, becoming crispy and slightly crisped around the edges. This indicates that the fat has rendered properly, creating a flavorful, crunchy texture. If the skin looks pale or soggy, it may need more time in the oven to crisp up.
- Juices Running Clear: Another key indicator is the juices. When you make a small incision in the thickest part of the chicken thigh, the juices should run clear, not pink. Pink or reddish juices indicate that the chicken is still undercooked and needs more time. Clear juices show that the chicken has reached the safe cooking temperature and is fully cooked through. If you’re unsure, this is an excellent secondary way to confirm the chicken’s doneness, especially if you don’t have a thermometer handy.
- Crispy Skin Texture: Besides the color, the texture of the skin is also an important visual cue. When properly cooked, the skin should be crisp and slightly curled, with no rubbery or soft spots. The oil, seasonings, and cooking process should have transformed the skin into a perfect crispy layer.
By paying attention to these visual signs – golden-brown skin and clear juices – you can tell when your chicken thighs are done and ready to be served.
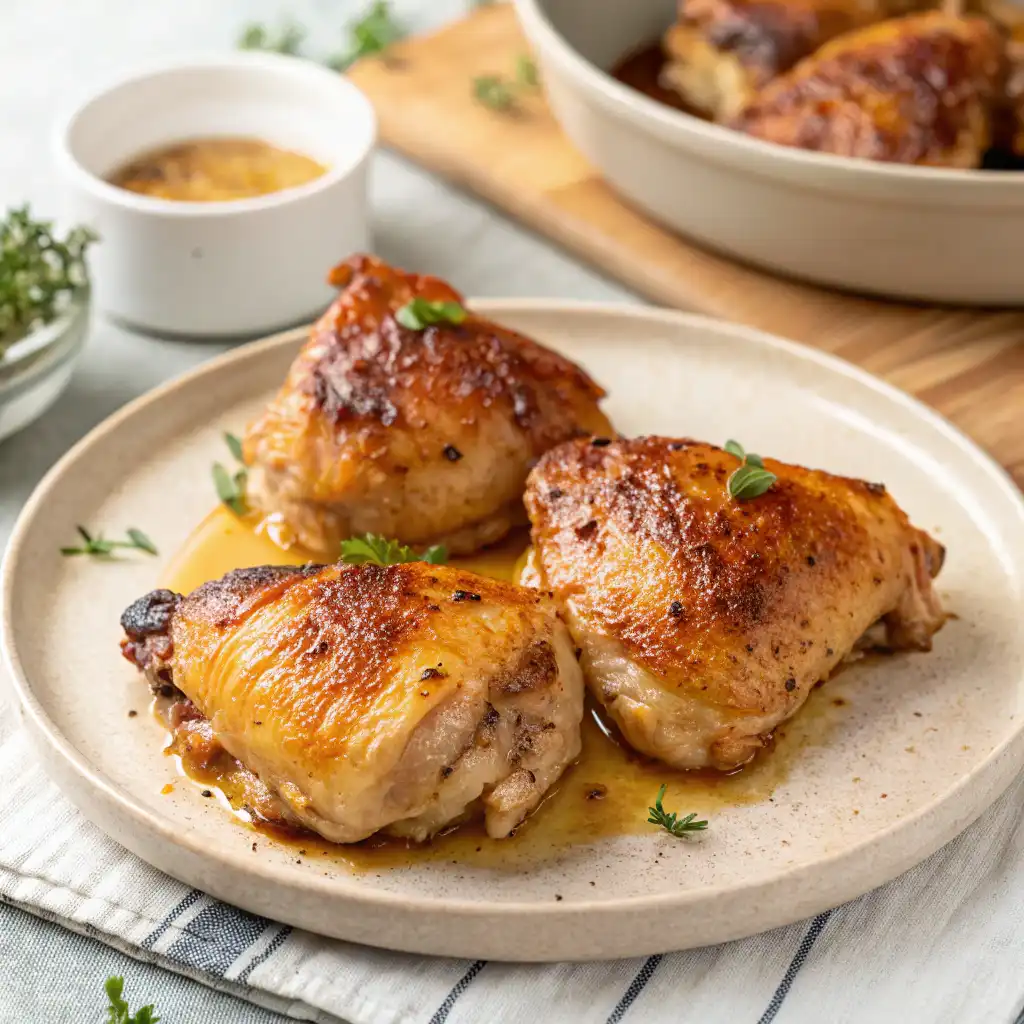
Resting Time
After removing your chicken thighs from the oven, it’s essential to allow them to rest for a short period. Here’s why:
- Juices Redistribution: When chicken thighs (or any meat) cook, the juices inside are pushed toward the center of the meat due to the heat. If you cut into the chicken immediately after cooking, the juices will spill out, leaving the meat dry. Resting the chicken for 5 to 10 minutes after cooking allows the juices to redistribute throughout the meat, keeping it moist and juicy. This ensures every bite is tender and flavorful.
- Enhancing Flavor: Resting not only helps with juiciness but also enhances the overall flavor. As the chicken thighs cool slightly, the seasonings have time to settle, and the flavors become more balanced and intensified. This is especially important if you’ve used a marinade or a dry rub, as the resting period allows those flavors to infuse into the meat more thoroughly.
- Optimal Texture: Resting your chicken thighs also allows the skin to maintain its crispiness. Cutting into them too soon can result in the loss of that beautiful, crispy texture as the heat escapes. By giving the thighs a few minutes of rest, you ensure that the skin stays perfectly crisp while the interior remains tender and juicy.
- Serving Tip: Place the chicken thighs on a plate or cutting board and loosely cover them with foil during the resting time to keep them warm. Avoid covering them tightly, as this can cause the skin to become soggy.
Allowing your chicken thighs to rest after baking is an essential step in the cooking process, ensuring that every bite is juicy, flavorful, and perfectly textured.
Final Thoughts
“In conclusion, baked chicken thighs are a delicious, juicy, and cost-effective meal option that is perfect for both beginners and seasoned cooks. With their rich flavor, forgiving nature, and ability to stay tender even when cooked at the right temperature, they make an excellent choice for any home cook. By using simple seasonings, marinades, and following key steps like preheating your oven, ensuring the right internal temperature, and resting the meat, you can achieve perfectly baked chicken thighs every time. Whether you’re looking for a quick dinner or something to impress guests, baked chicken thighs offer a versatile and satisfying solution. For another flavorful option, check out our Grilled Lemon Herb Salmon Recipe, which is equally easy and delicious.
FAQs About Baked Chicken Thighs
1. What is the best temperature to bake chicken thighs?
The best temperature to bake chicken thighs is 400°F (200°C). This high heat ensures crispy skin while keeping the meat juicy.
2. How long does it take to bake chicken thighs at 400°F?
It usually takes 25 to 40 minutes to bake chicken thighs at 400°F, depending on their size and whether they’re bone-in or boneless. Always check the internal temperature to reach 165°F for perfect results.
3. How do I know when chicken thighs are done?
Chicken thighs are done when they reach an internal temperature of 165°F (74°C). Additionally, the skin should be golden-brown and crispy, and the juices should run clear when you make a small incision.
4. Do I need to marinate chicken thighs before baking?
Marinating chicken thighs is optional but recommended for extra flavor. Simple marinades with lemon, olive oil, garlic, and herbs enhance the taste and juiciness of the meat.

Perfect Baked Chicken Thighs
Ingredients
- 4 bone-in skin-on chicken thighs
- 2 tbsp olive oil
- 1 tsp garlic powder
- 1 tsp paprika
- 1/2 tsp salt
- 1/2 tsp black pepper
- 1/2 tsp dried thyme optional
- 1/2 tsp onion powder optional
Instructions
Preheat the Oven:
- Preheat your oven to 400°F (200°C).
Prepare the Chicken:
- Pat the chicken thighs dry with paper towels to remove excess moisture, ensuring crispy skin.
Season the Chicken:
- Drizzle olive oil over the chicken thighs. In a small bowl, mix garlic powder, paprika, salt, pepper, thyme, and onion powder. Rub the seasoning mixture evenly over the chicken thighs.
Bake the Chicken:
- Place the seasoned chicken thighs on a baking sheet, skin-side up. Bake for 30-40 minutes, or until the internal temperature reaches 165°F (74°C) and the skin is crispy and golden.
Rest the Chicken:
- Let the chicken rest for 5 minutes before serving to lock in the juices.
Serve and Enjoy:
- Serve with your favorite sides and enjoy your perfectly baked chicken thighs!
Notes
- Calories: 280
- Fat: 18g
- Saturated Fat: 5g
- Cholesterol: 90mg
- Sodium: 350mg
- Carbohydrates: 2g
- Fiber: 0g
- Sugar: 0g
- Protein: 25g
- Vitamin A: 2%
- Vitamin C: 0%
- Calcium: 2%
- Iron: 8%